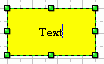
 To add text to a shape, just select
this shape and start typing text in it. The text editing mode
turns on immediately to let you enter and edit the text. (You can also use the
F2 key to activate the text editing mode.)
To add text to a shape, just select
this shape and start typing text in it. The text editing mode
turns on immediately to let you enter and edit the text. (You can also use the
F2 key to activate the text editing mode.)Most of shapes in ConceptDraw can contain text.
ConceptDraw offers you extensive formatting capabilities, and various tools
for working with text.
Adding Text to a Shape
Editing Shape's Text
Searching and Replacing Text
Formatting Text
Repositioning Text
Adjusting a Shape's Size to Fit Its Text
The Text Auto-Expand Mode
To add text to a shape, just select
this shape and start typing text in it. The text editing mode
turns on immediately to let you enter and edit the text. (You can also use the
F2 key to activate the text editing mode.)
If the text appears too small, the view will zoom in
automatically for better visibility.
Such behavior is set by default. You can customize it in the Preferences
dialog (Edit / Preferences), on the View
tab. Here you can set the minimal font size in points for the visible text.
For smaller values, autozooming will be activated when you edit text.
This tab also lets you disable autozooming if necessary.
When you finish editing, press Esc or F2, or just click outside the text box to quit the text editing mode.
When in the text editing mode, you can use the Text toolbar to change font, font size, font attributes (bold, italic, underlined), and other properties. You may turn on the Text Auto-Expand mode to make shapes grow after their text.
Note: If a hyperlink (an Internet or e-mail address) is found in the text, it will be automatically assigned to the shape when you finish editing. To learn more about this feature (URL autoparsing) and about hyperlinks of different types, see Internet - Using Hyperlinks.
For more information about the Text toolbar see Toolbars - Text
To edit a shape's text, you need to switch to the text editing mode. Select the shape and press the F2 key. If the shape has no hyperlink and its double-click behavior wasn't altered, you may also double-click the shape to start editing text. The text editing mode will turn on, where you can type or delete text, change its formatting. To leave the text editing mode, press F2 or ESC. You may also click away from the shape.
See also the Adding Text to a Shape section.
In ConceptDraw you can search for words or phrases in a document and replace them with required text. On the Edit menu, click Find/Replace. In the Find/Replace dialog enter the sting you wish to find, and (if needed) - the string you want to replace it with. Click Find Next. If a match is found, the program will make this text selected and you can replace it if you wish.
For more information about the Find/Replace dialog see Dialogs - Modal Dialogs - Find/Replace.
You can change text properties using the text formatting tools on the Text toolbar.

You can also use the Text Properties dialog (menu Format / Text).
 Ctrl + Shift + T Ctrl + Shift + T |
 Cmd + Shift + T
 |
The changes apply:
1) If a text block is selected - to the selected text block;
2) If one or more shape is selected - to all selected shapes text.
To change formatting for a portion of text, select it.
Enter the text editing mode (by pressing F2 or choosing the Text
tool), then select the needed text area using the mouse or Arrow
keys with Shift held down.
You can change font and font size, font and background color, text alignment
and style either with the text formatting tools or in the Text Properties
dialog. Some parameters, such as indents and margins, can only be set in the
Text Properties dialog.
Note: New shape adopt the most recent formatting
settings. This helps to maintain consistent look throughout the document.
The Increase Font Size  and Decrease
Font Size
and Decrease
Font Size  apply to selected shapes or text blocks only, and don't affect global formatting
settings.
apply to selected shapes or text blocks only, and don't affect global formatting
settings.
To change font for selected shapes or text blocks, use the Font tab of the Text Properties dialog (menu Format / Text), or the toolbar:
 Select
a new font from the drop-down list on the Text toolbar.
Select
a new font from the drop-down list on the Text toolbar.
 To change
the font size, choose one from the font size list, or type the desired size
in the box.
To change
the font size, choose one from the font size list, or type the desired size
in the box.
To increase/decrease the font size by one point, use the Increase Font
Size and Decrease Font Size
buttons.
| |
|
| Ctrl + ">" | Cmd + ">" |
| Ctrl + "<" | Cmd + "<" |
To change text color, use the Text Color tool  .
.
 .
.
or by using the keyboard:
|
|
|
|
| Ctrl + B | Cmd(Ctrl) + B | Bold |
| Ctrl + I | Cmd(Ctrl) + I | Italic |
| Ctrl + U | Cmd(Ctrl) + U | Underline |
By default, text has no background and text boxes are transparent (except for
the text boxes of connectors).
You can assign the background color for the text in the selected shape(s) in
two ways:
 .
. Each shape's text consists of one or more paragraphs. Each paragraph begins
with a new line. To start a new paragraph, press the Enter
key. For each paragraph, you may set alignment and indentation.
You can align selected paragraph(s) on the left side of the Text
Box, on its right side, or on its center.
To align a paragraph, click somewhere within its bounds and click on one of
the alignment tools on the toolbar:
Align Left, Align Center,
or Align Right or use the keyboard:
|
|
|
|
| Ctrl + L | Cmd(Ctrl) + L | Align Left |
| Ctrl + E | Cmd(Ctrl) + E | Align Center |
| Ctrl + R | Cmd(Ctrl) + R | Align Right |
Several selected paragraphs can be aligned likewise (select them with the mouse or use Shift + Arrows).
If no paragraph is active, the alignment will be applied to the whole text of the selected shape(s).
Vertical alignment determines the position of the whole text with
respect to its Text Box. You can align the text at the top, middle
or bottom of the Text Box.
Select the shape(s) and use the following toolbar buttons: Align Top,
Align Middle or Align Bottom.
Note: The text alignment can also be set in
the Text Properties dialog (Format / Text):
you can specify the horizontal alignment on the Paragraph tab,
and the vertical alignment on the Text Block tab.
For more information about the Text toolbar see Toolbars
- Text.
For more information about the Text Properties toolbar see
Dialogs - Modal Dialogs - Text Properties.
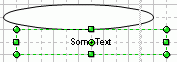
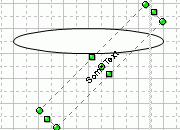
You can reposition the text with respect to the shape by manipulating its
Text Box. This can be done with the Text Box
tool  . You can select it on the
Drawing Tools toolbar or from the Insert / Text Box
menu.
. You can select it on the
Drawing Tools toolbar or from the Insert / Text Box
menu.
This tool lets you select, resize, rotate and move a shape's Text Box, changing its appearance and position independently of the shape to which the text belongs.
Select the Text Box tool and click on a shape with text. The text's alignment box will appear, allowing to you reposition, rotate or resize the text box by dragging the handles.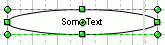
This tool is especially useful for working with Direct Connectors.
Note: The Text Box tool can be used to draw Text shapes (shapes, that contain only text). To draw a Text shape, switch to the Text Box tool and drag it to draw a rectangular area, and on releasing the mouse button start typing.
Sometimes you may need to make a shape the same size as the text inside it.
You can do this in the following way:
Select the shape, then select Fit to Text from the Shape
menu. The shape will be enlarged or shrunk to match the size of its text (its
text box).
You can also use the Fit To Text tool  on the Arrange & Make Same toolbar.
For more information about the Arrange & Make Same toolbar see Toolbars - Arrange & Make Same.
You can use the Text Auto-Expand mode
 if you want the shape
to grow automatically when you add text to it.
if you want the shape
to grow automatically when you add text to it.
When this mode is on, the shape grows in width to fit the longest line of the
text, and in height according to the number of lines in the text. Resizing only
takes place when you edit the text.
Once activated, this mode works for all the open documents during the entire work session. It is reset when you quit ConceptDraw.
Note: If the Text Box does not coincide with the shape's alignment box, only the text box is resized. For 1D shapes, it is only the text box that is resized. The actual shape won't change its size.